Summary
This write-up documents my first Xbox 360 hardware modification using RGH3 on an Xbox 360 S with a Corona v4 / Waitsburg 4GB motherboard.
The project involved identifying the correct motherboard revision, verifying NAND type and POST_OUT availability, soldering the required points for the RGH3 wiring, flashing XeLL, and debugging several hardware and tooling issues along the way.
Although the final result was a successful boot into XeLL and a working RGH3 setup, the most valuable part of the project was the debugging process. It required careful validation of solder joints, understanding board-specific differences, checking assumptions about the boot process, and dealing with unreliable tooling behavior.
The main skills involved were:
- hardware identification and board revision research
- SMD soldering
- NAND reading and writing
- firmware flashing
- hardware/software debugging
- documentation of failure points and troubleshooting steps
High-level overview of RGH3
RGH3 is a modern variant of the Xbox 360 Reset Glitch Hack. The general idea behind RGH is to interfere with the console’s boot process at a very specific moment, causing the CPU to misbehave in a controlled way and allowing unsigned code to run.
Older RGH methods usually relied on an external glitch chip. RGH3 is different because it can use the Xbox 360’s own SMC instead of a separate glitch chip, which is why it is often described as a “chipless” method. In practice, the install still requires wiring, resistors, NAND access, and board-specific preparation, but there is no separate glitch chip installed.
In this setup, the important pieces are:
- NAND: stores the console firmware image. It needs to be read, backed up, modified, and written back.
- XeLL: a small loader used during the process to boot unsigned code and retrieve the CPU key.
- PLL: used as part of the glitching process.
- SMC_POST / SMC_PLL: points involved in the SMC-based glitch wiring.
- POST_OUT: a signal used to observe CPU boot progress. On some Corona boards this is missing from the motherboard layout, so a POST fix adapter is required.
This write-up is not meant to be a full universal installation guide. It documents my specific board, my process, and the issues I encountered.
Motivation
I have been interested in console modding for a long time.
My first console was a PS2 Phat (SCPH-50004) with a MODBO modchip already installed. Later I used a PSP (PSP-1000), a PS Vita (PCH-2004), a Japanese Nintendo 3DS, and also modified my hard-modded PS2 to boot games from an HDD.
The Xbox 360 was different because it was the first hard mod I performed myself, and also my first real attempt at SMD soldering.
I originally started this project around February 2025, but put it aside after running into several issues. I came back to it later with better soldering skills and a better understanding of the process. That second attempt was where the project finally came together.
Identification
Before doing any soldering, I needed to identify the exact motherboard revision and related hardware characteristics. This matters because the required wiring and preparation steps depend on the specific Xbox 360 revision.
For this part I cross-referenced multiple resources, mainly the Xbox 360 Hub guide, MrMario’s video guide, ConsoleMods, XenonLibrary, and Octal’s identification wizard.
Motherboard
Starting off the modding I only had a name: Xbox 360 S Console, written on the barcode sticker of the console.
Motherboard version is based on the current rating (octal450 wizard):
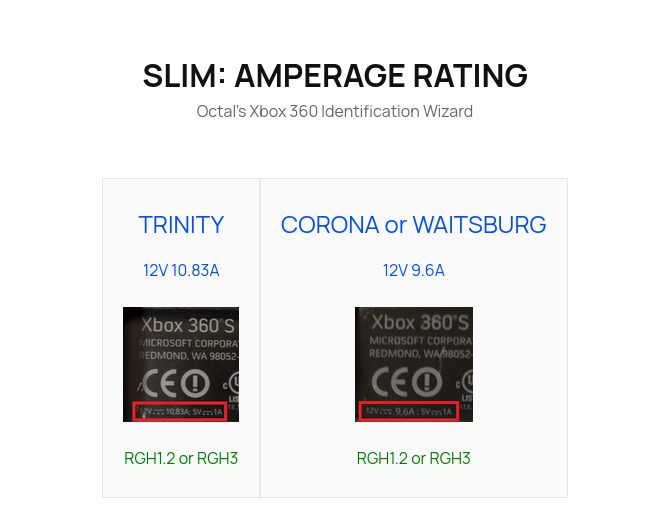
This is what I had:
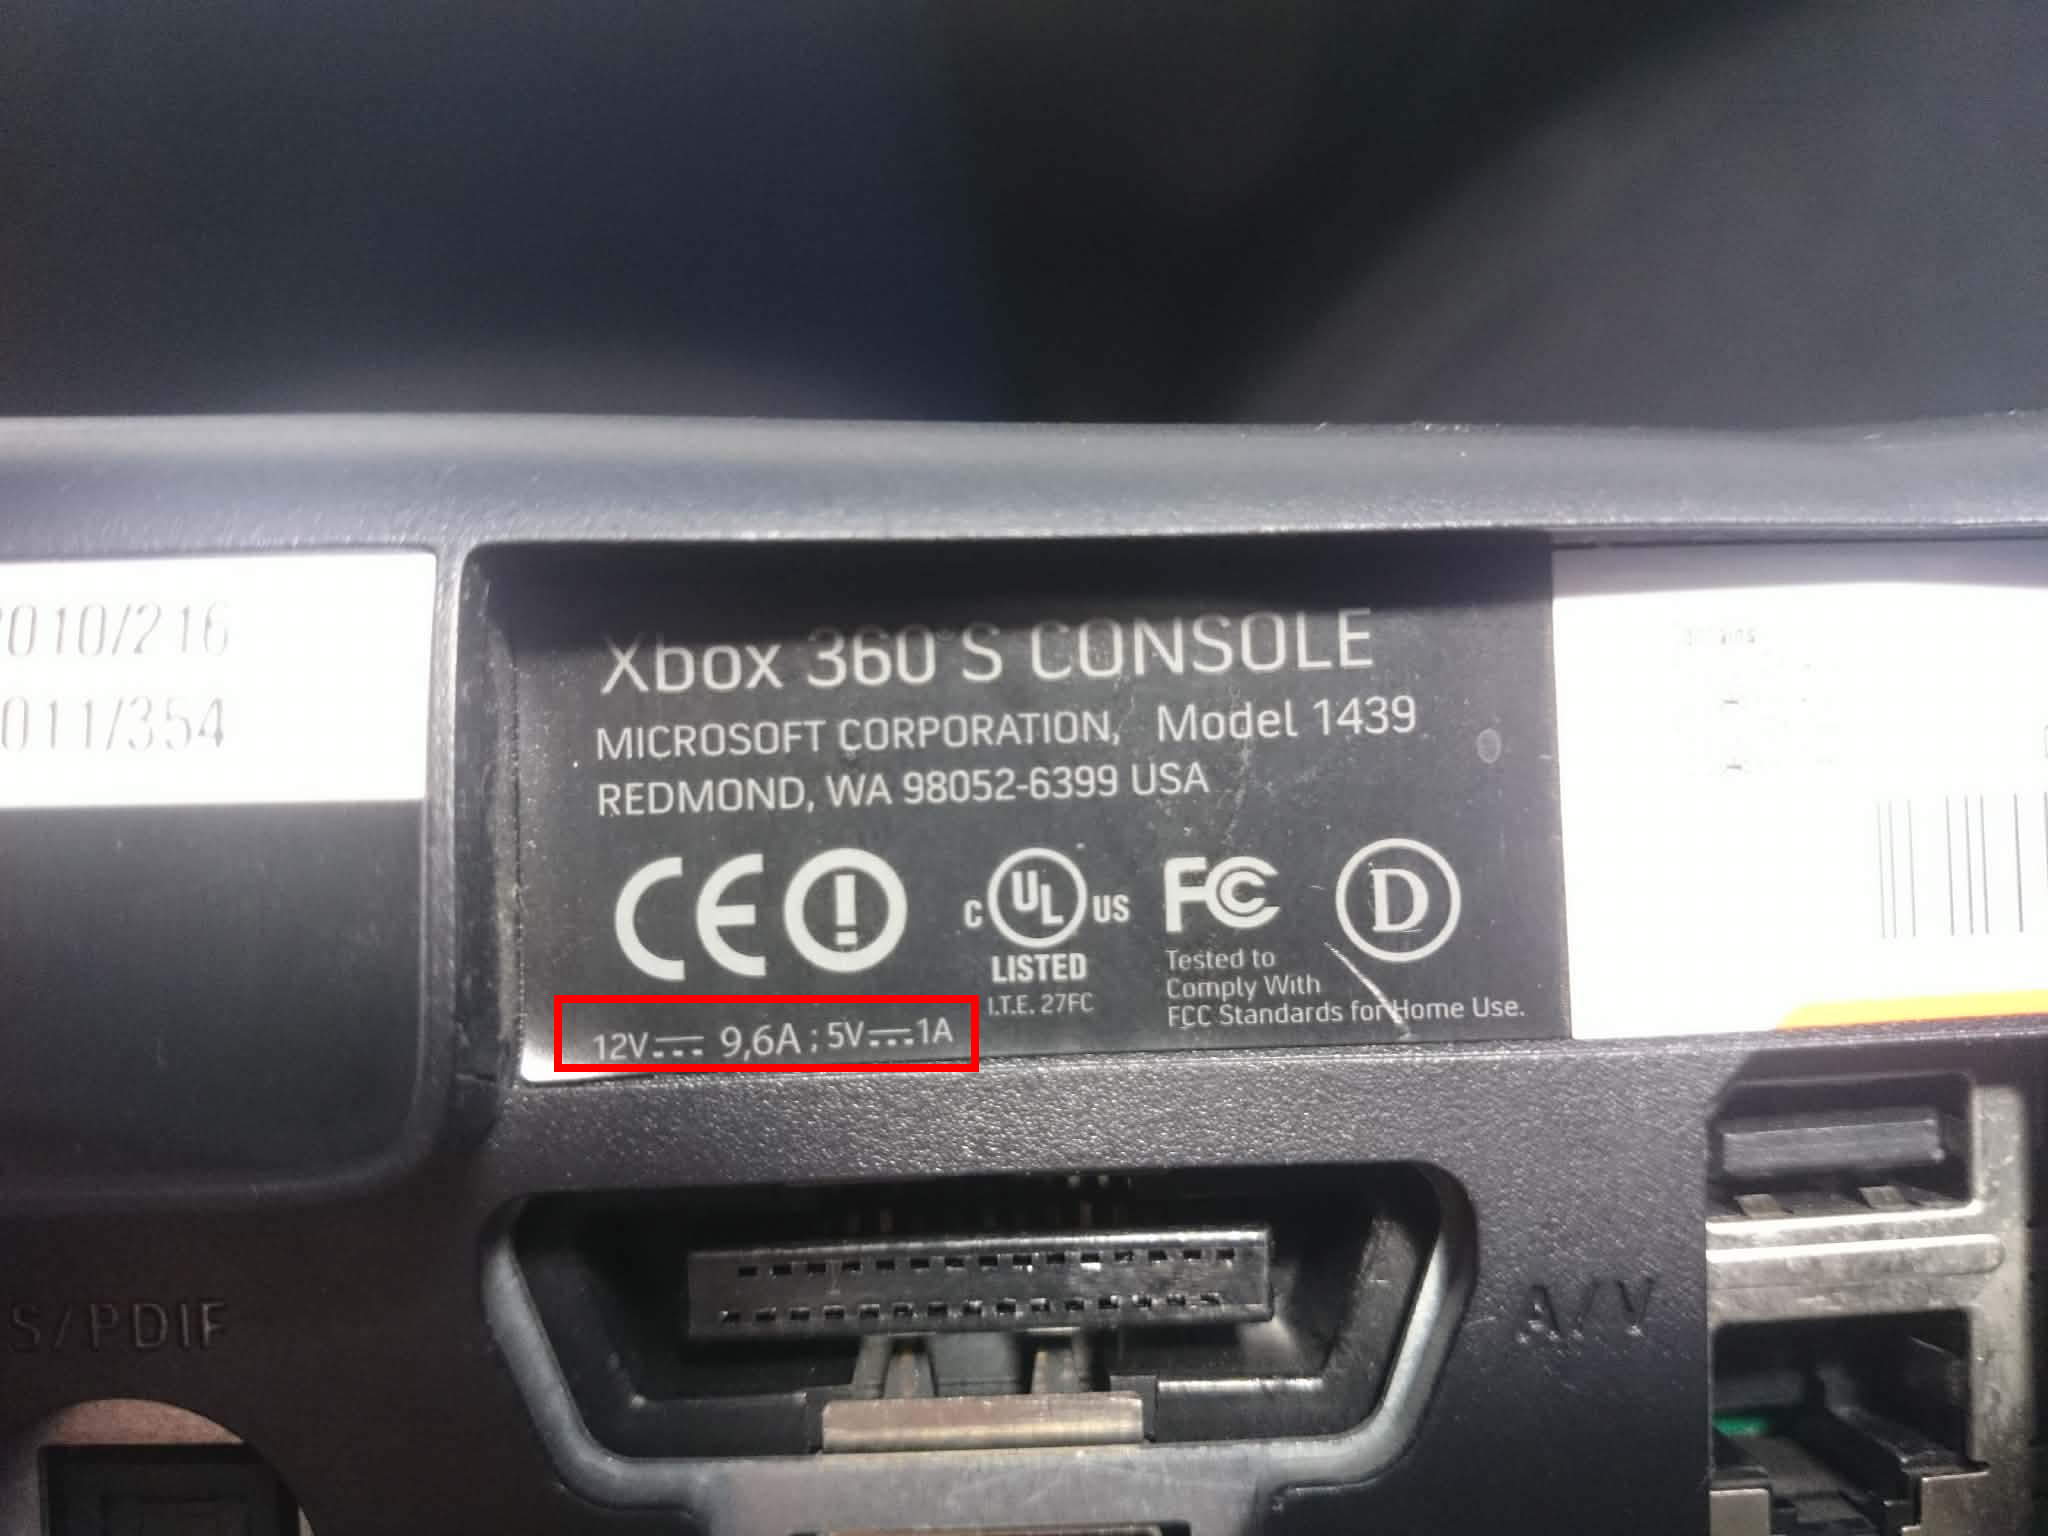
Meaning it was either a CORONA or WAITSBURG. It is important because later steps will have to be done based on specific models.
POST_OUT
POST_OUT is used to observe the CPU’s boot progress. In the context of RGH installs, it is important because the glitch timing depends on knowing where the CPU is during the boot sequence.
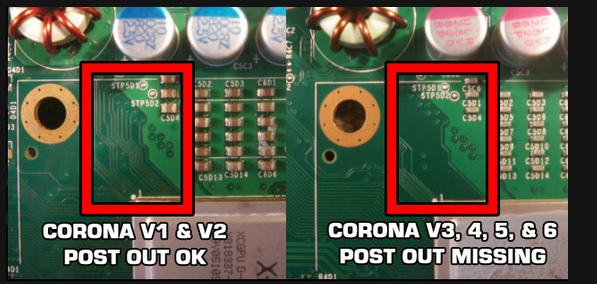
In my case its missing:
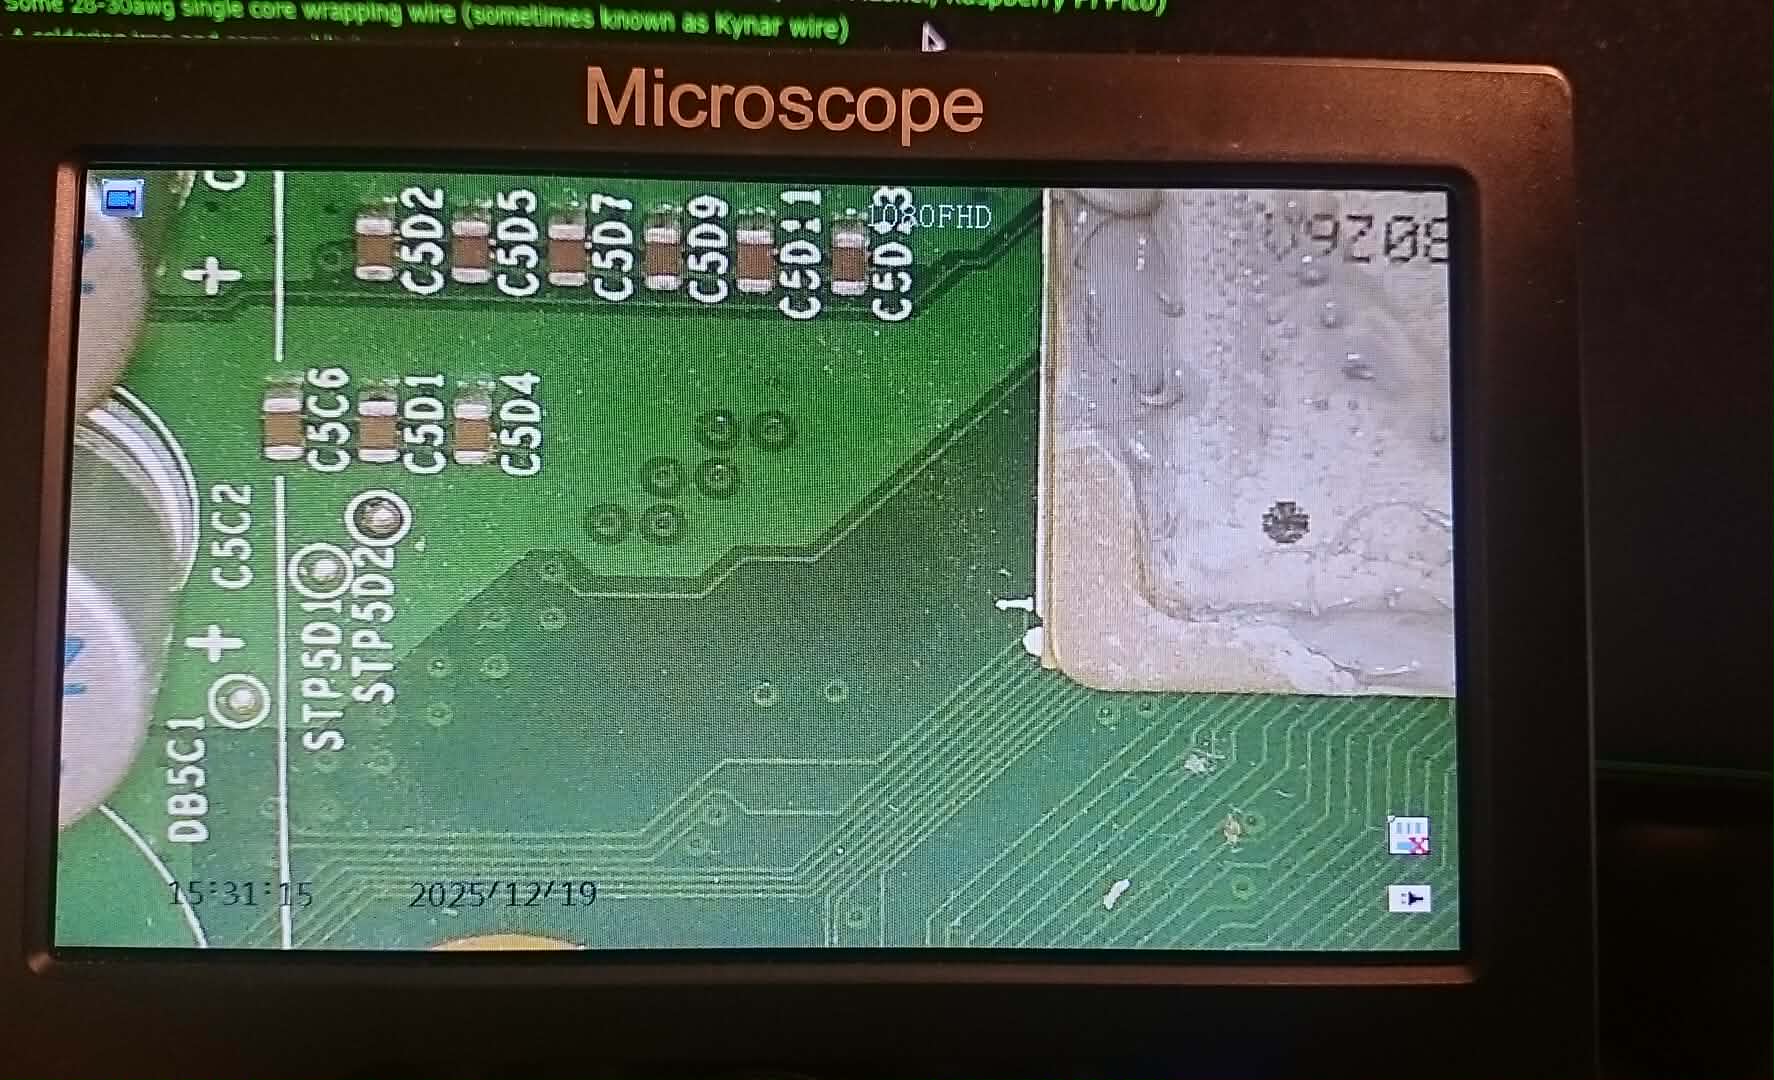
A POST_OUT adapter will have to be used and also it means the mobo is either a CORONA v3,4,5 or 6.
NAND
Identification was performed based on this image:
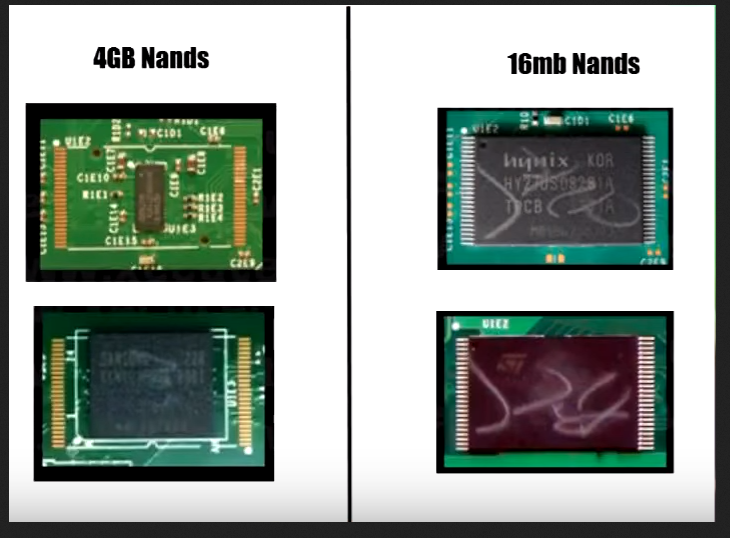
The NAND I had:
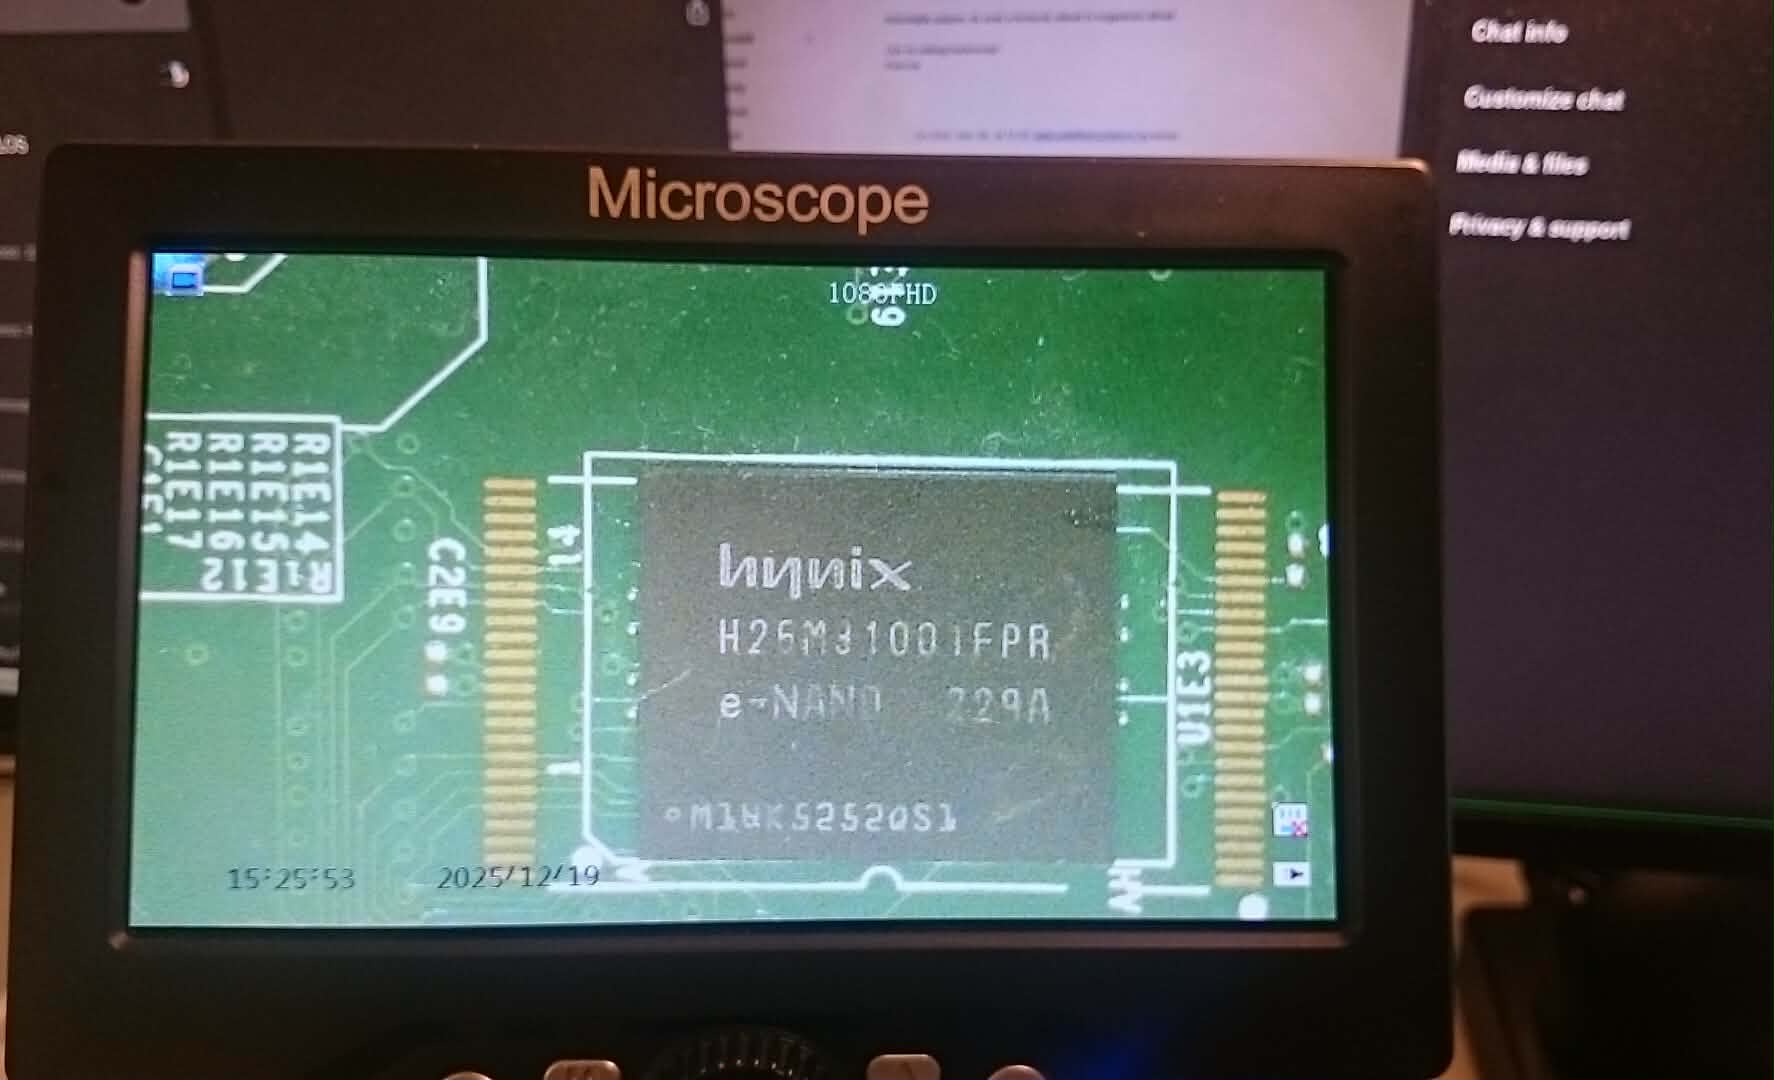
Looks like a 4GB but if we also search for the part number H26M31001FPR we can check the datasheet where it states the size of the memory:

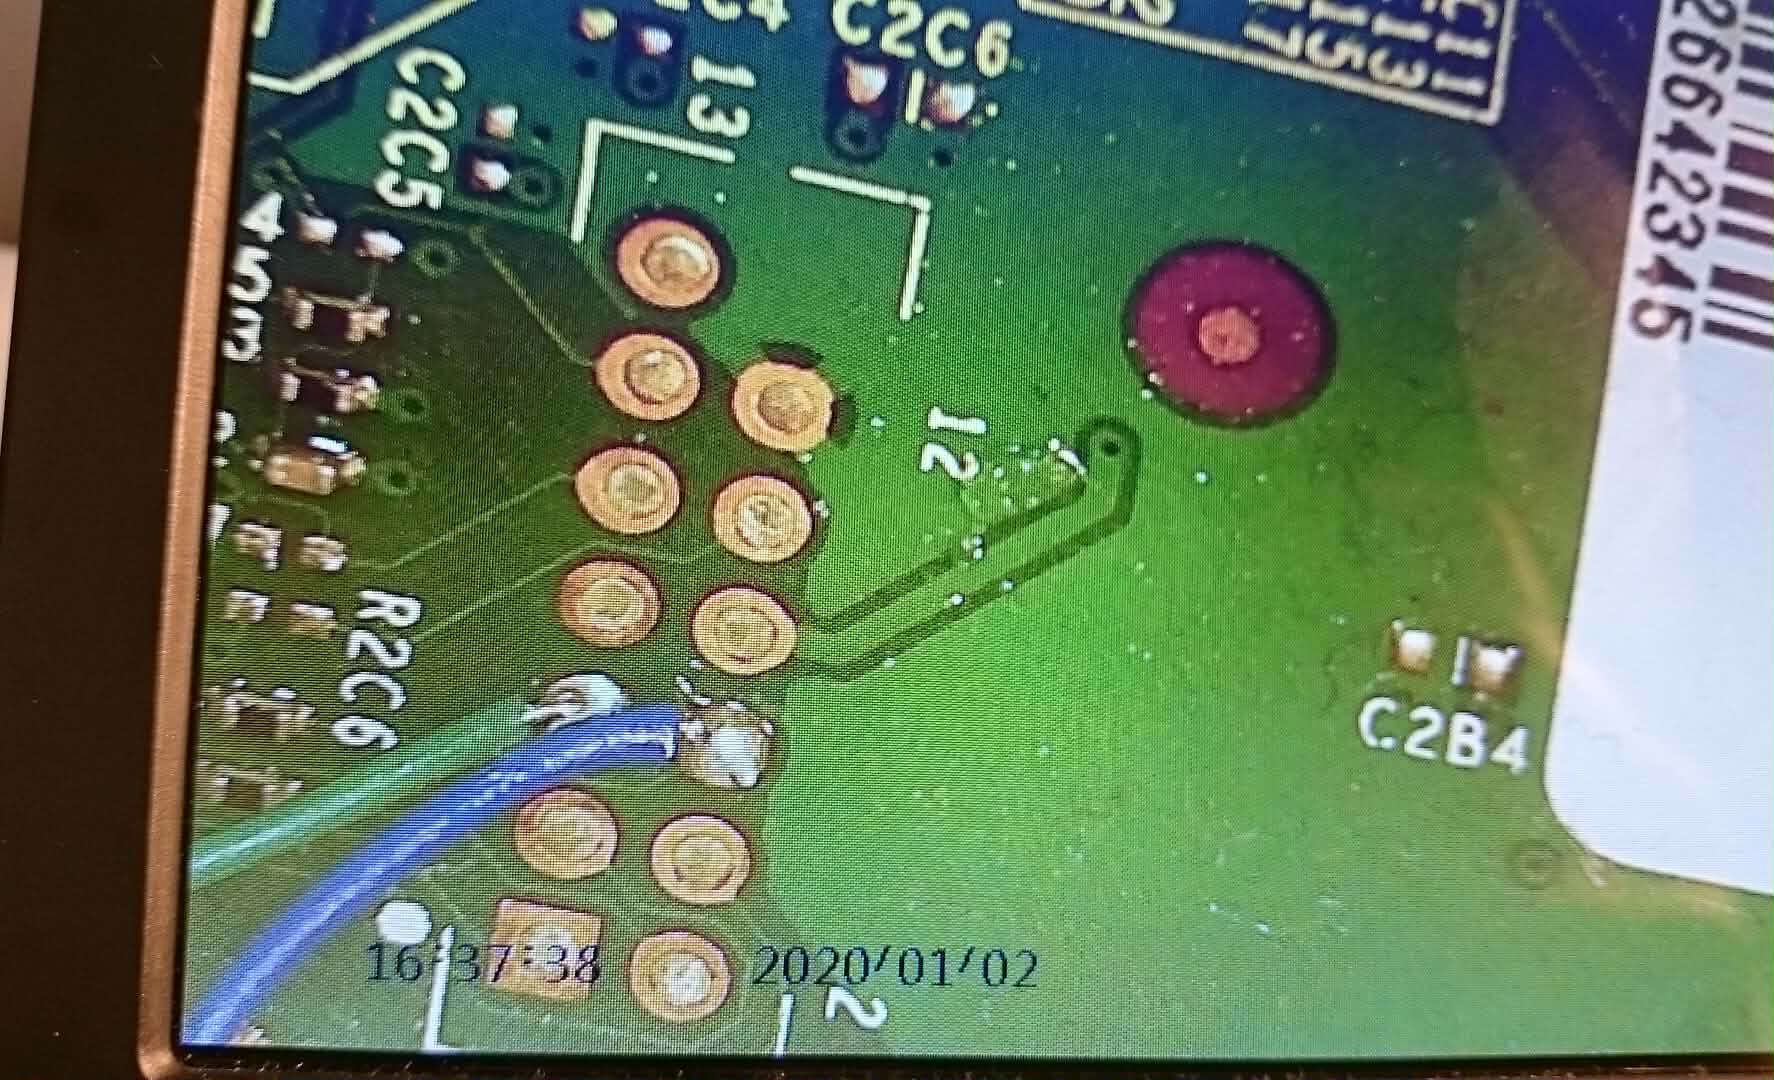
Resistor bridging
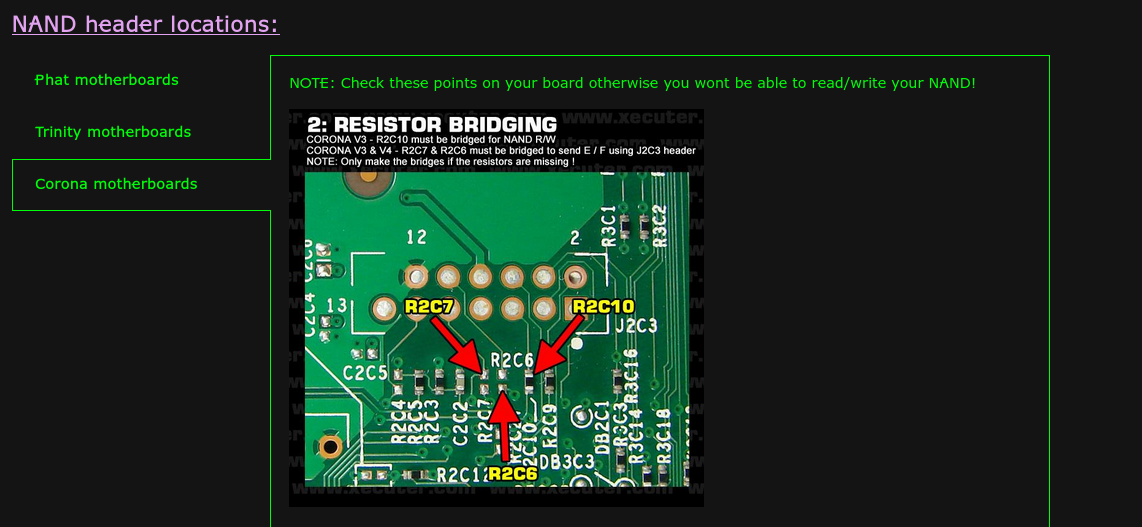
R2C6 & R2C7 are missing:
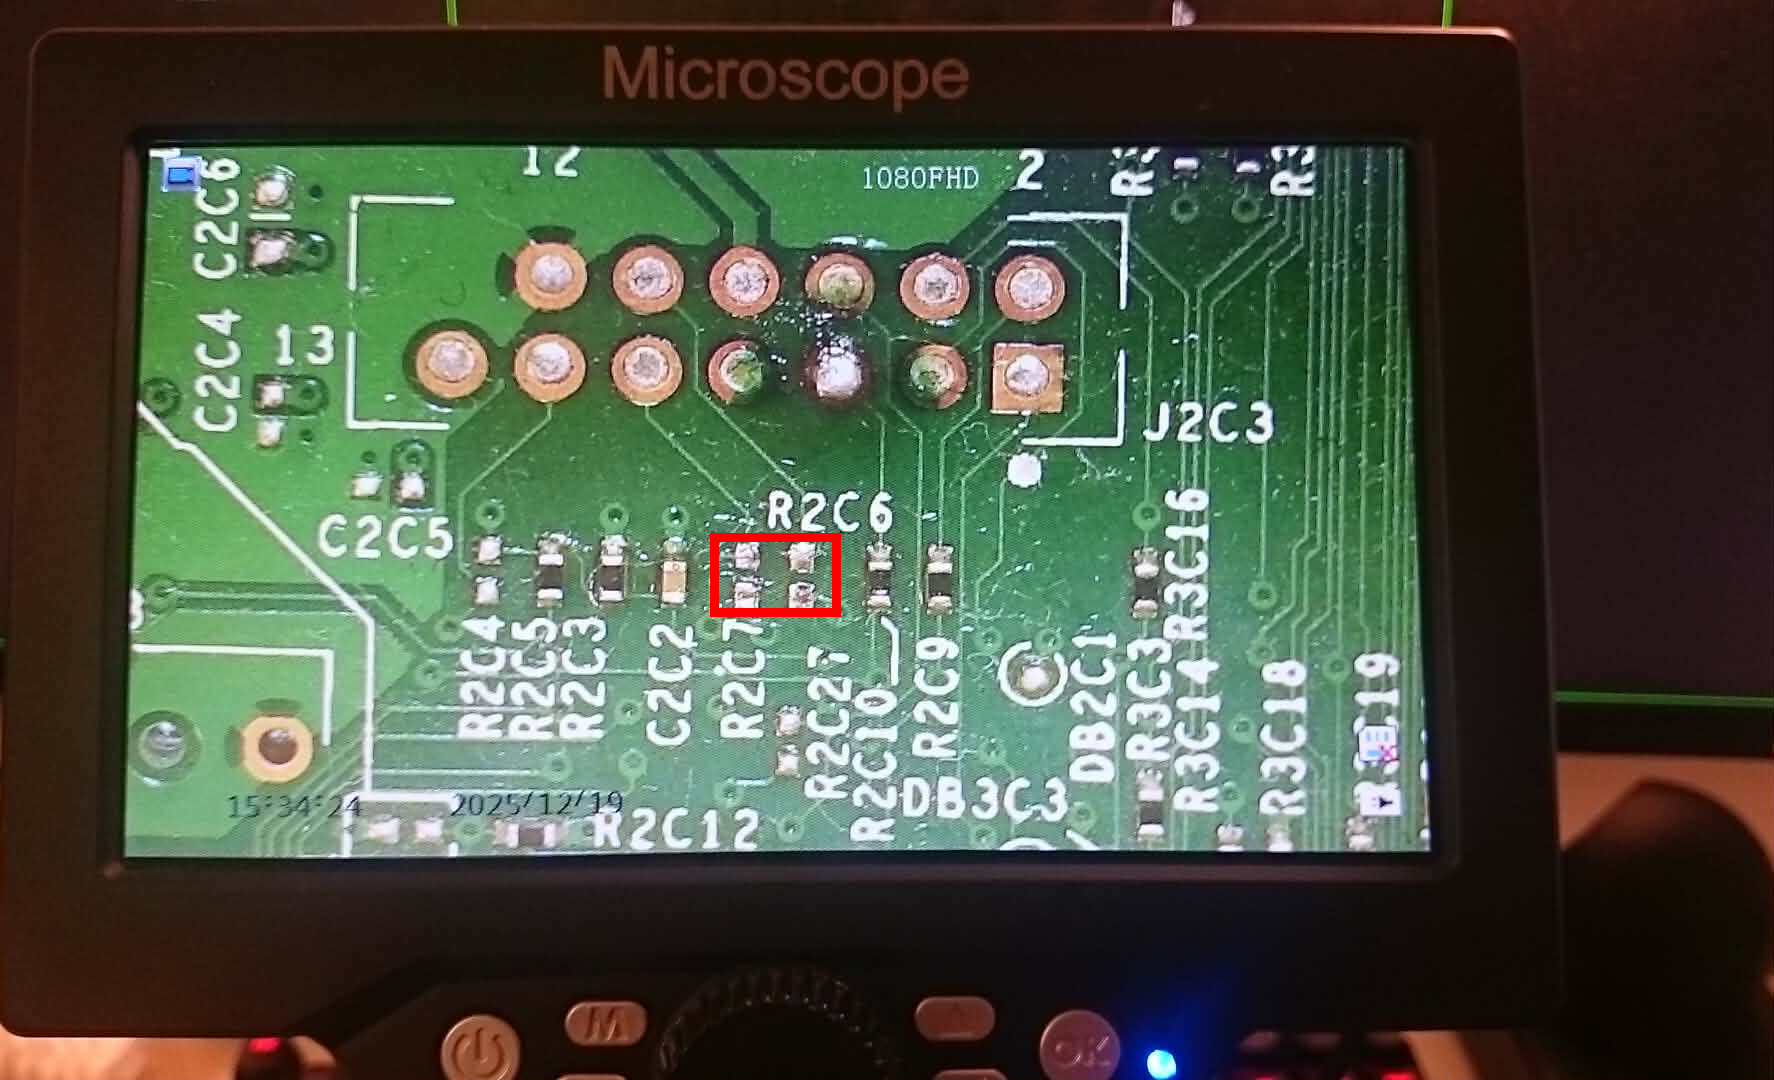
Based on the guide and MrMario’s Corona video, this specific case did not require bridging, because only those two were missing.
I left them as-is, and the final install worked without bridging.
Corona, Waitsburg, Stringra ?
From ConsoleMods - RGH3:
" Waitsburg is the successor to Corona and is the final motherboard used in the Xbox 360 S. It is considered a revision of Corona despite having its own name."
“Commonly referred to by the community (but not by Microsoft) as “Corona V3” (16MB) and “Corona V4” (4GB). "
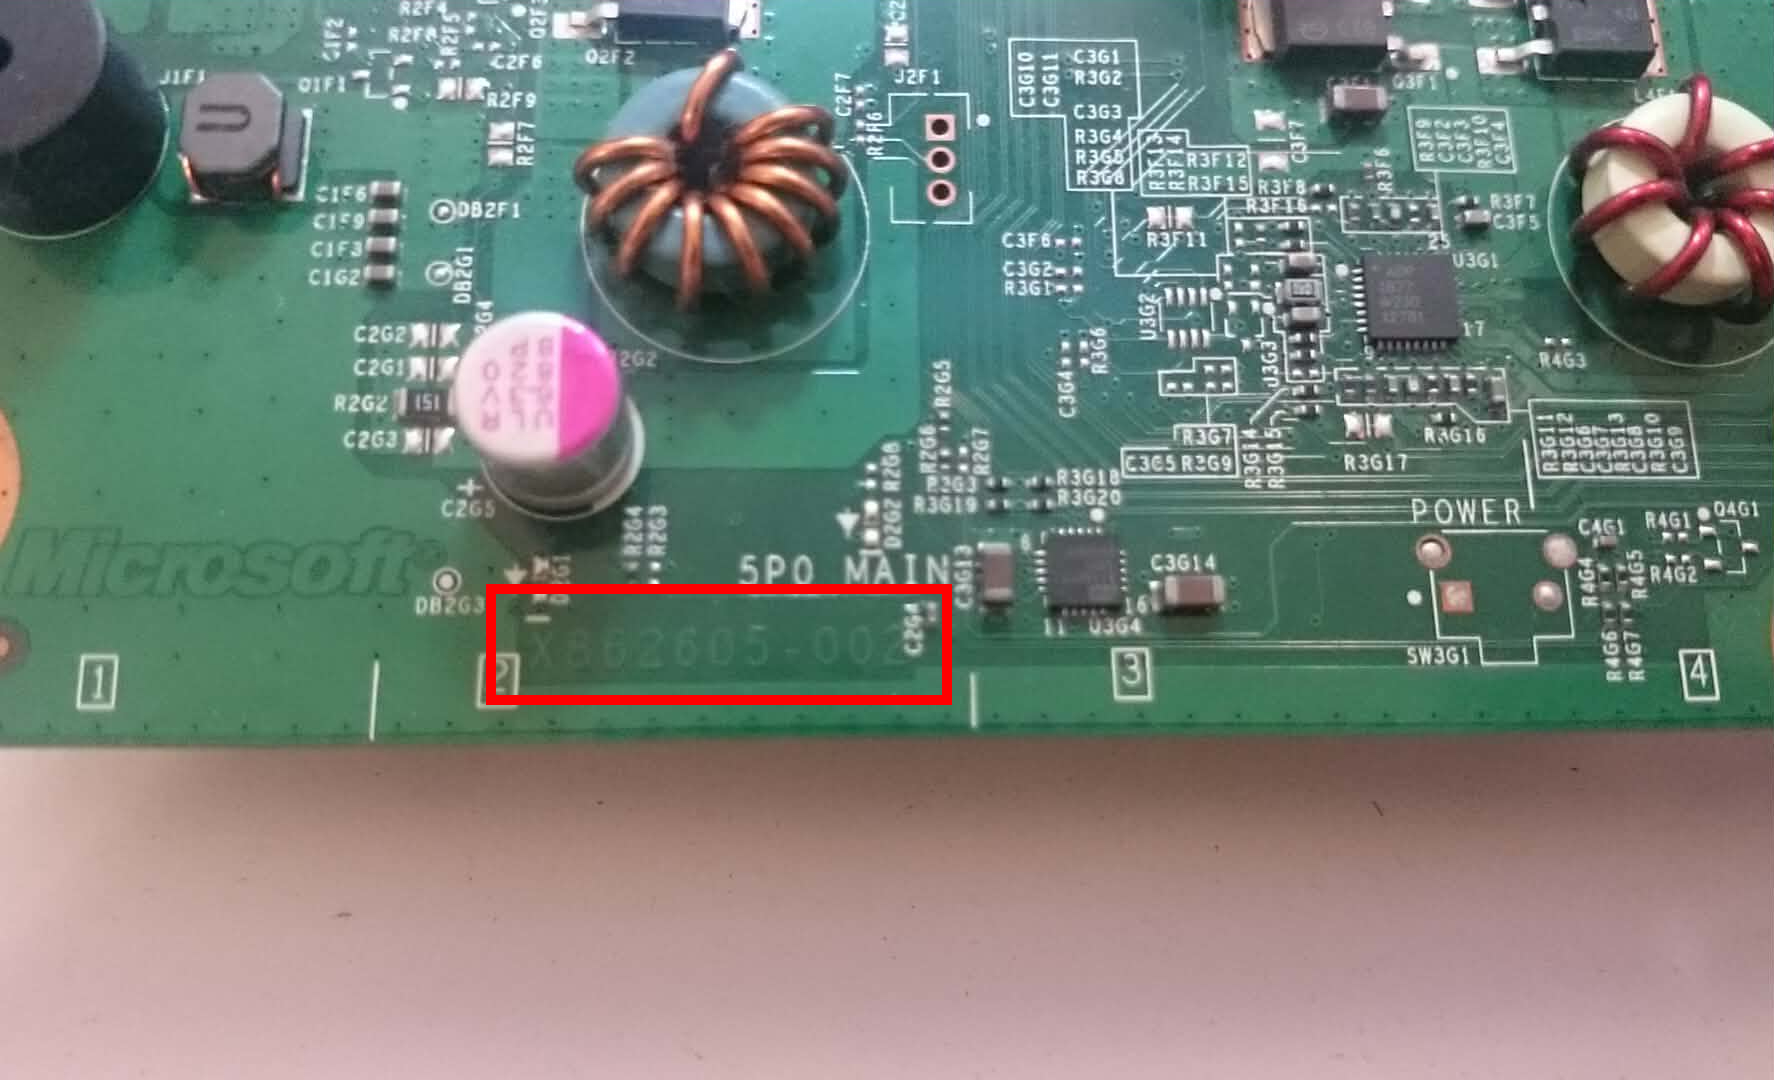
“You can also identify if you have a Waitsburg motherboard from a Corona by looking for the part number of X862605 on the bottom left of the PCB.”
My part number:
More evidences on Waitsburg here: XenonLibrary.
Conclusion of the identification
Multiple evidences suggest that my XBOX 360 S is a Corona v4 with the following configuration:
- Motherboard type: Waitsburg
- 4GB NAND
- No POST_OUT
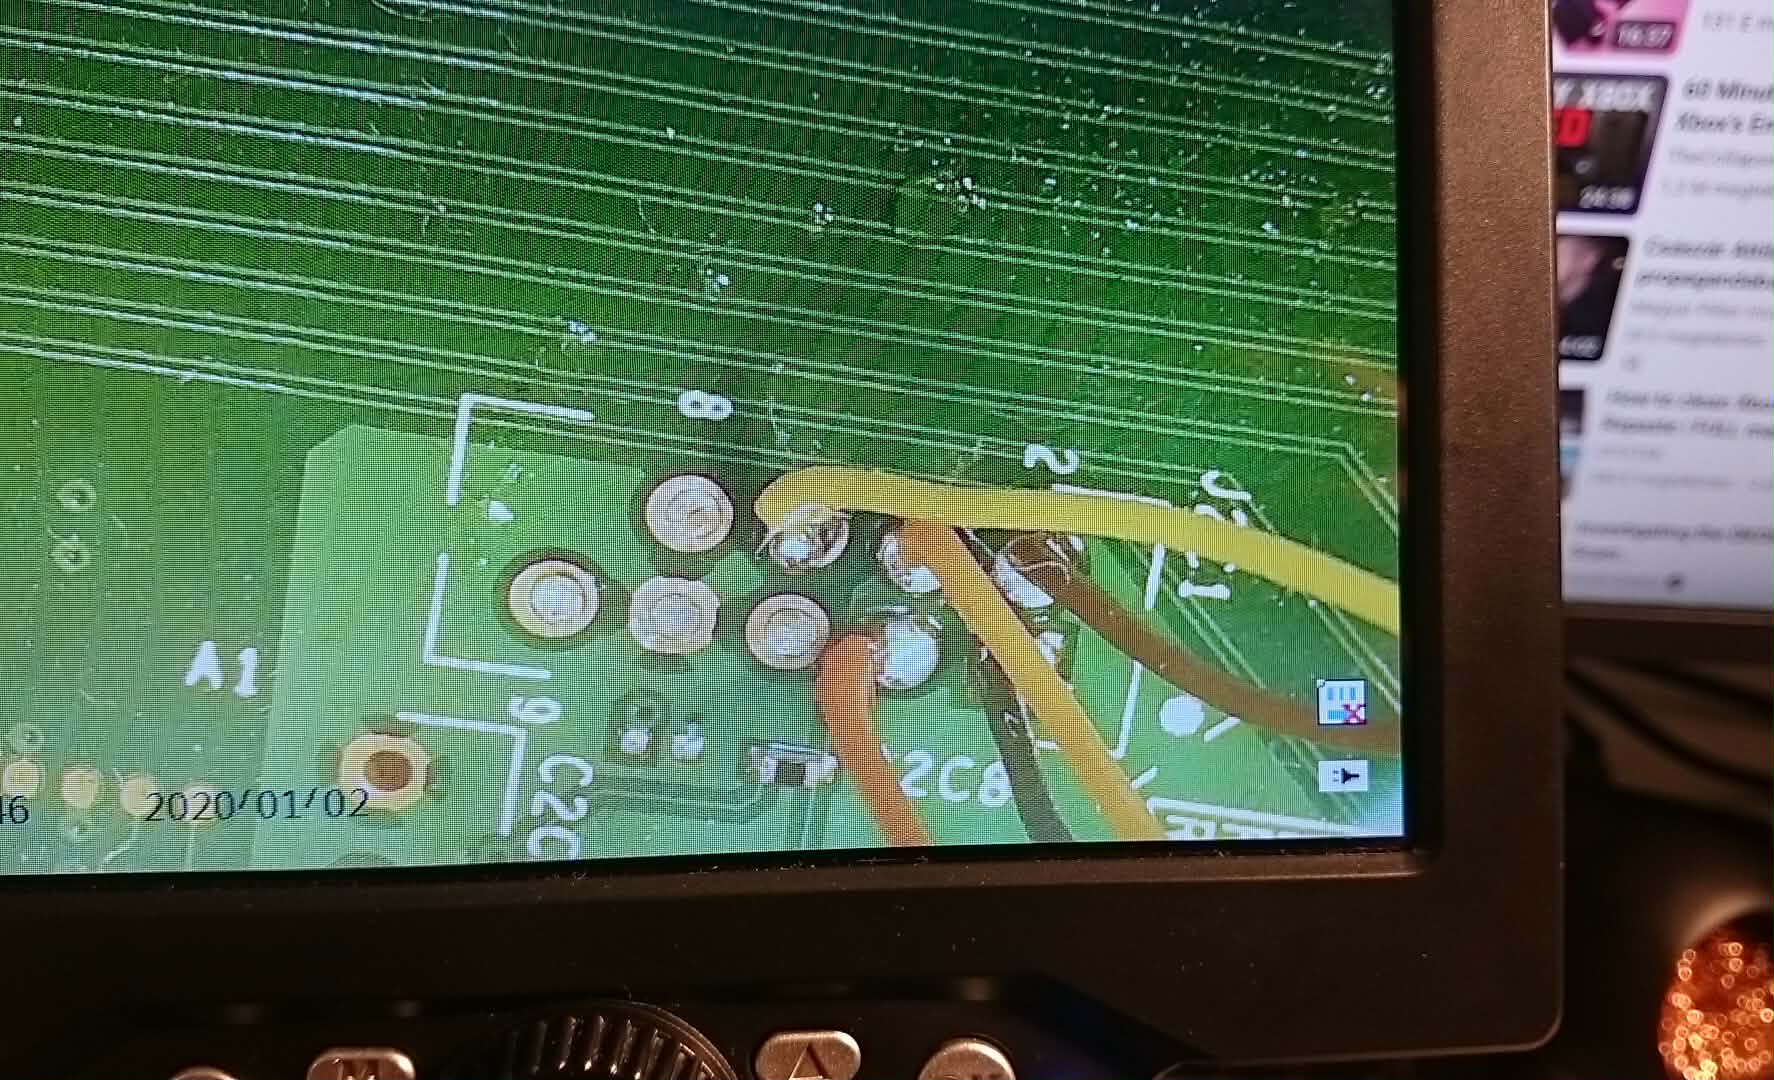
Preparation and soldering
All of the necessary points in the guide were cleaned, tinned and soldered to:
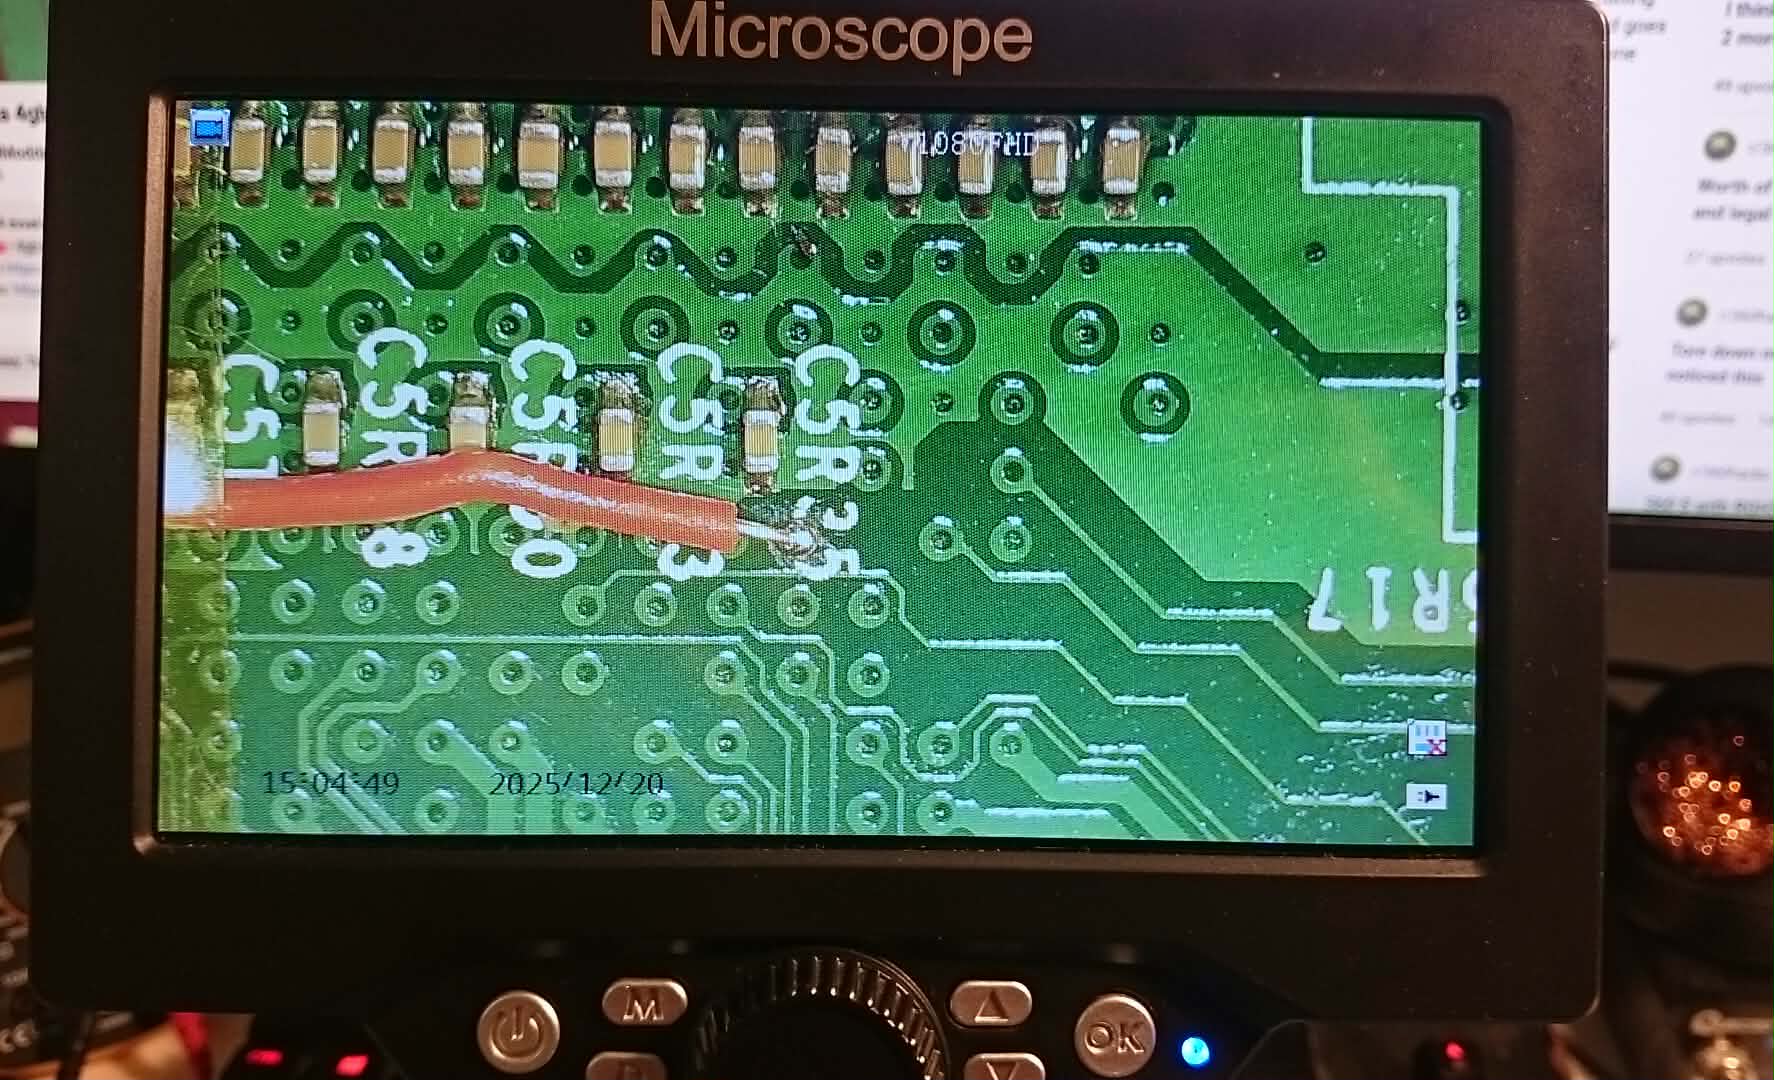
PLL:
The PLL point is part of the glitching path used by RGH3. The via had to be carefully scraped off before soldering.
A 1k resistor was installed between the required PLL-related points according to the guide. I covered the resistor with heat shrinking tube and secured the wiring with Kapton tape.
Unfortunately, I did not take a photo of the resistor installation, but it was included in the final working setup.
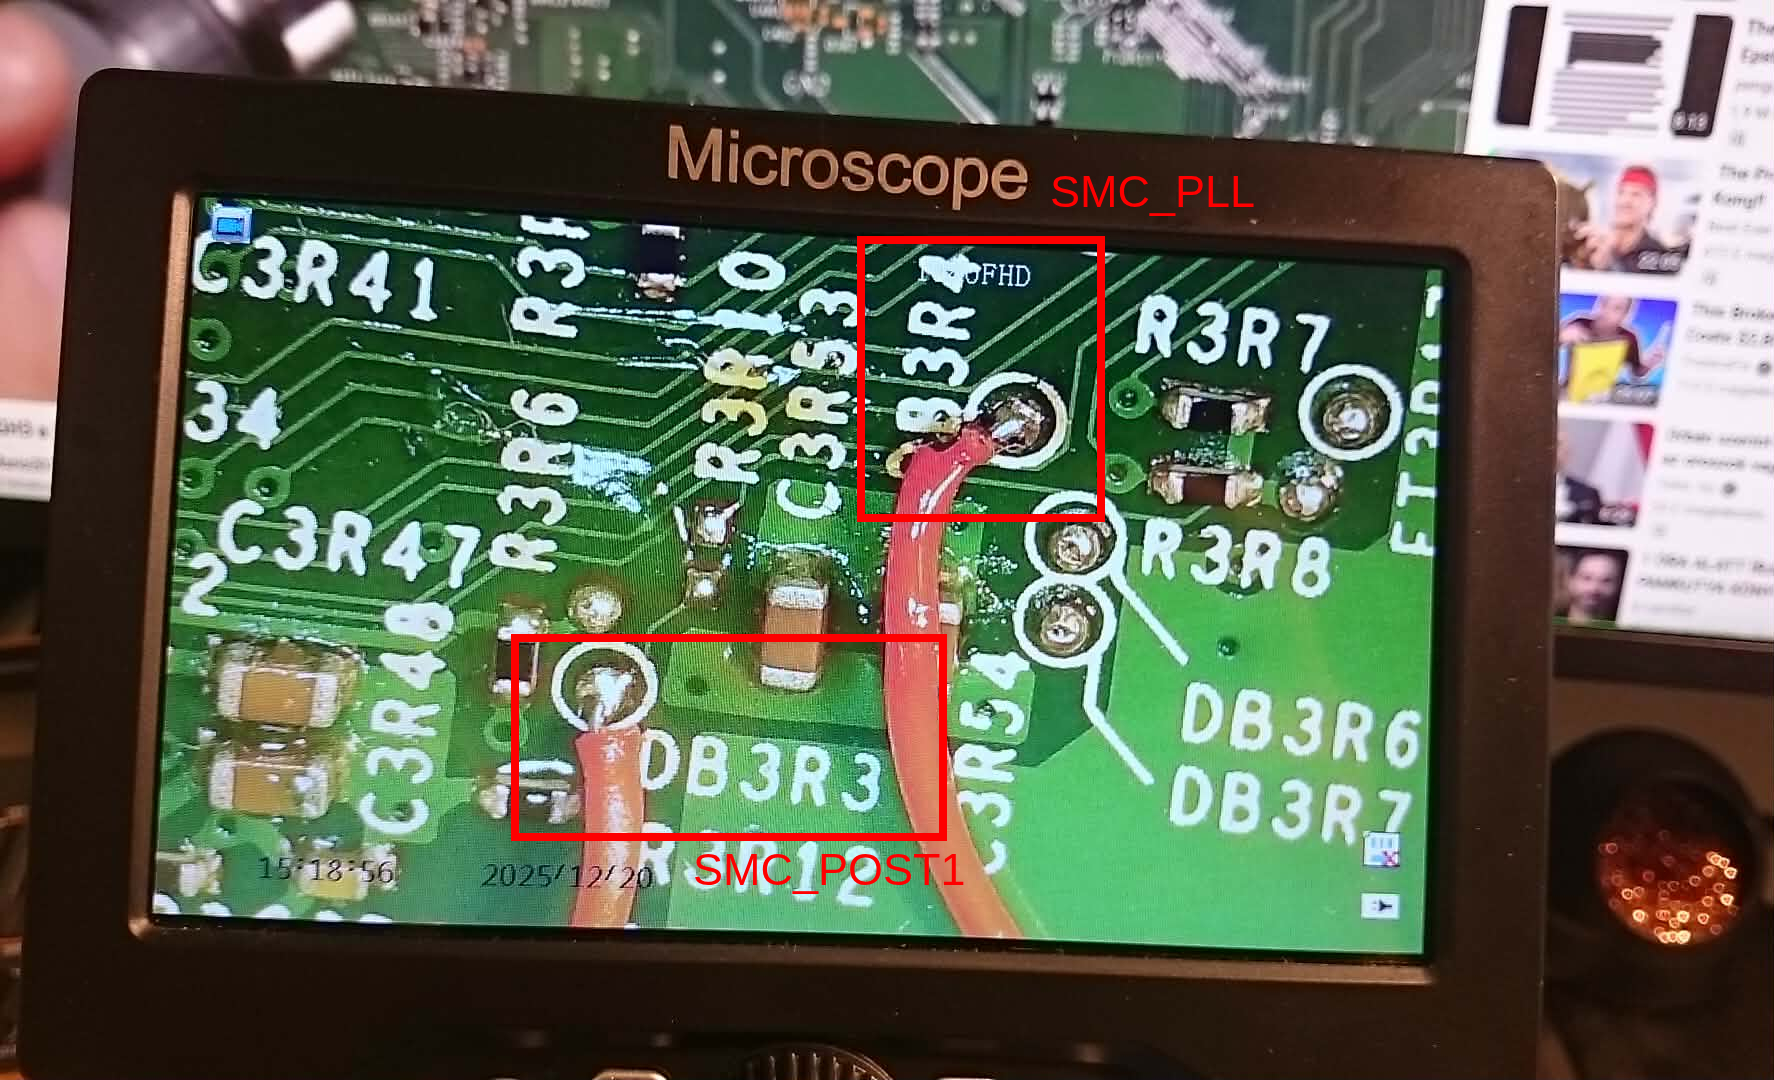
SMC_POST1 and SMC_PLL:
The SMC-related points are used because RGH3 relies on the console’s own SMC instead of an external glitch chip.
POST fix adapter
POST1 is connected to the post fix adapter. I ordered the adapter from AliExpress. The adapter has to go around the cpu making contact with the springy pin.
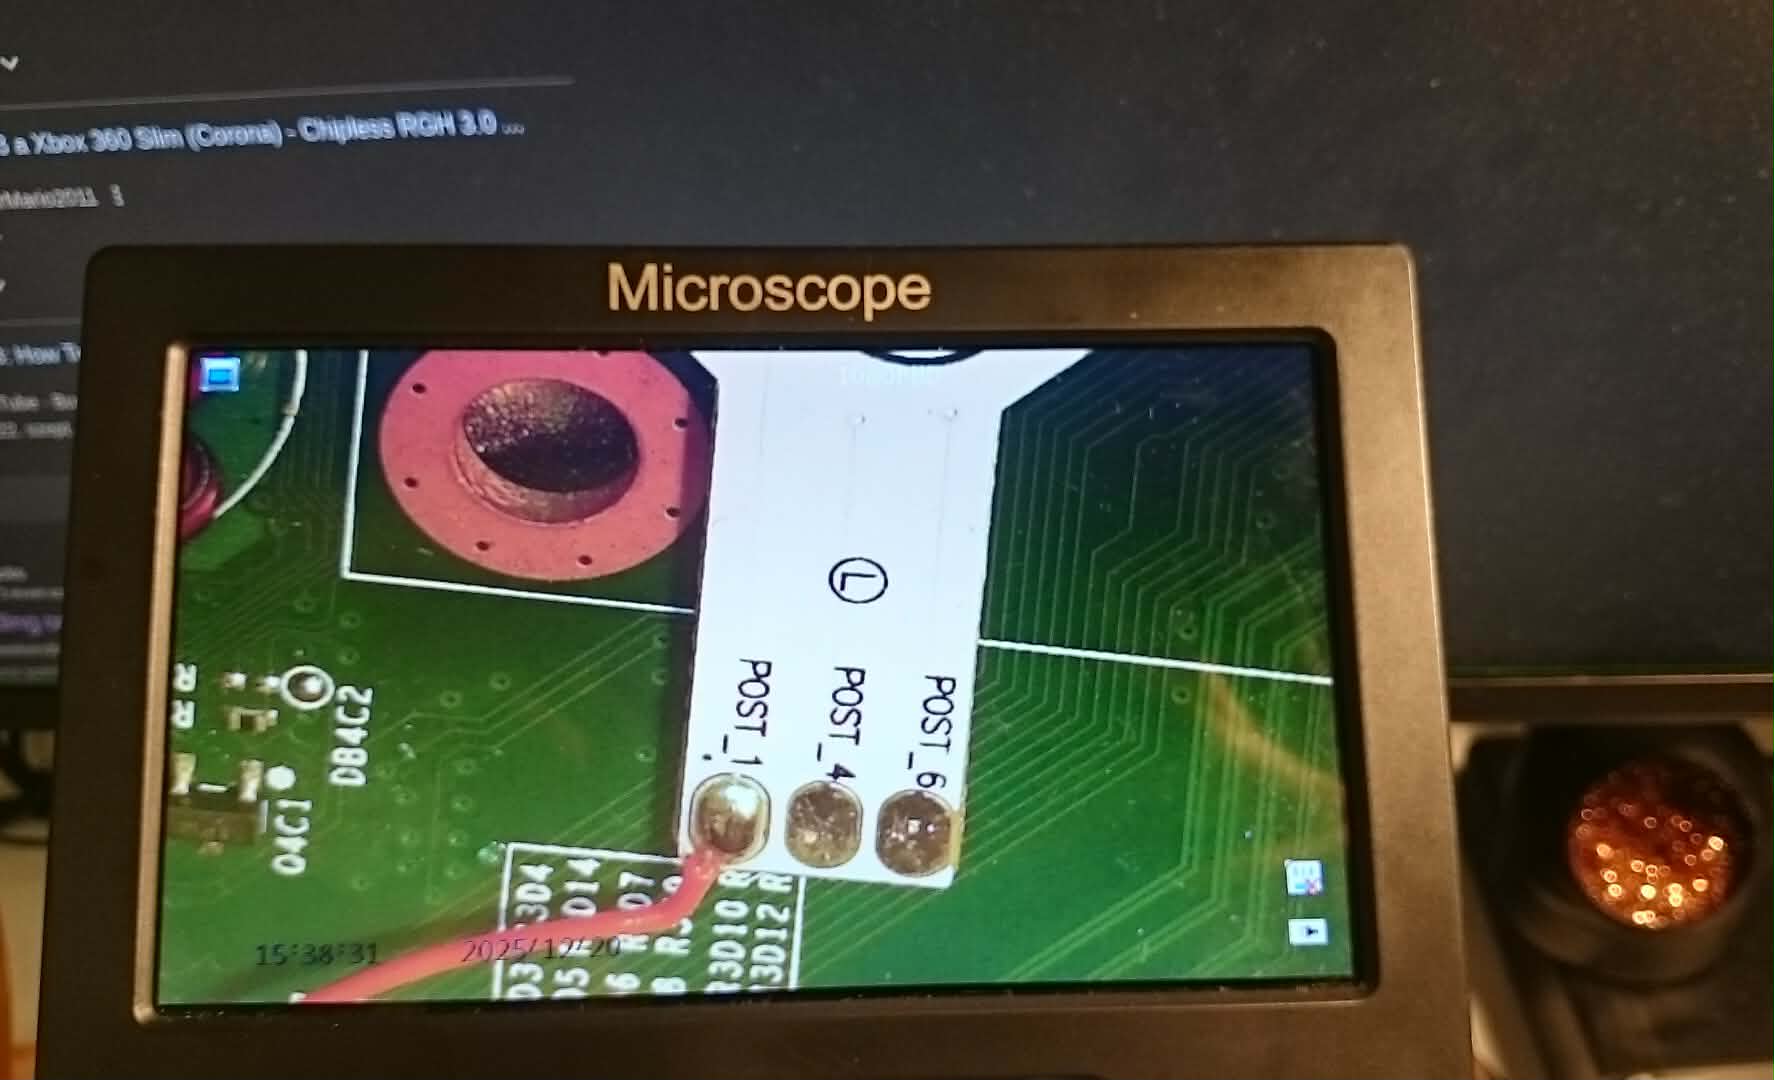
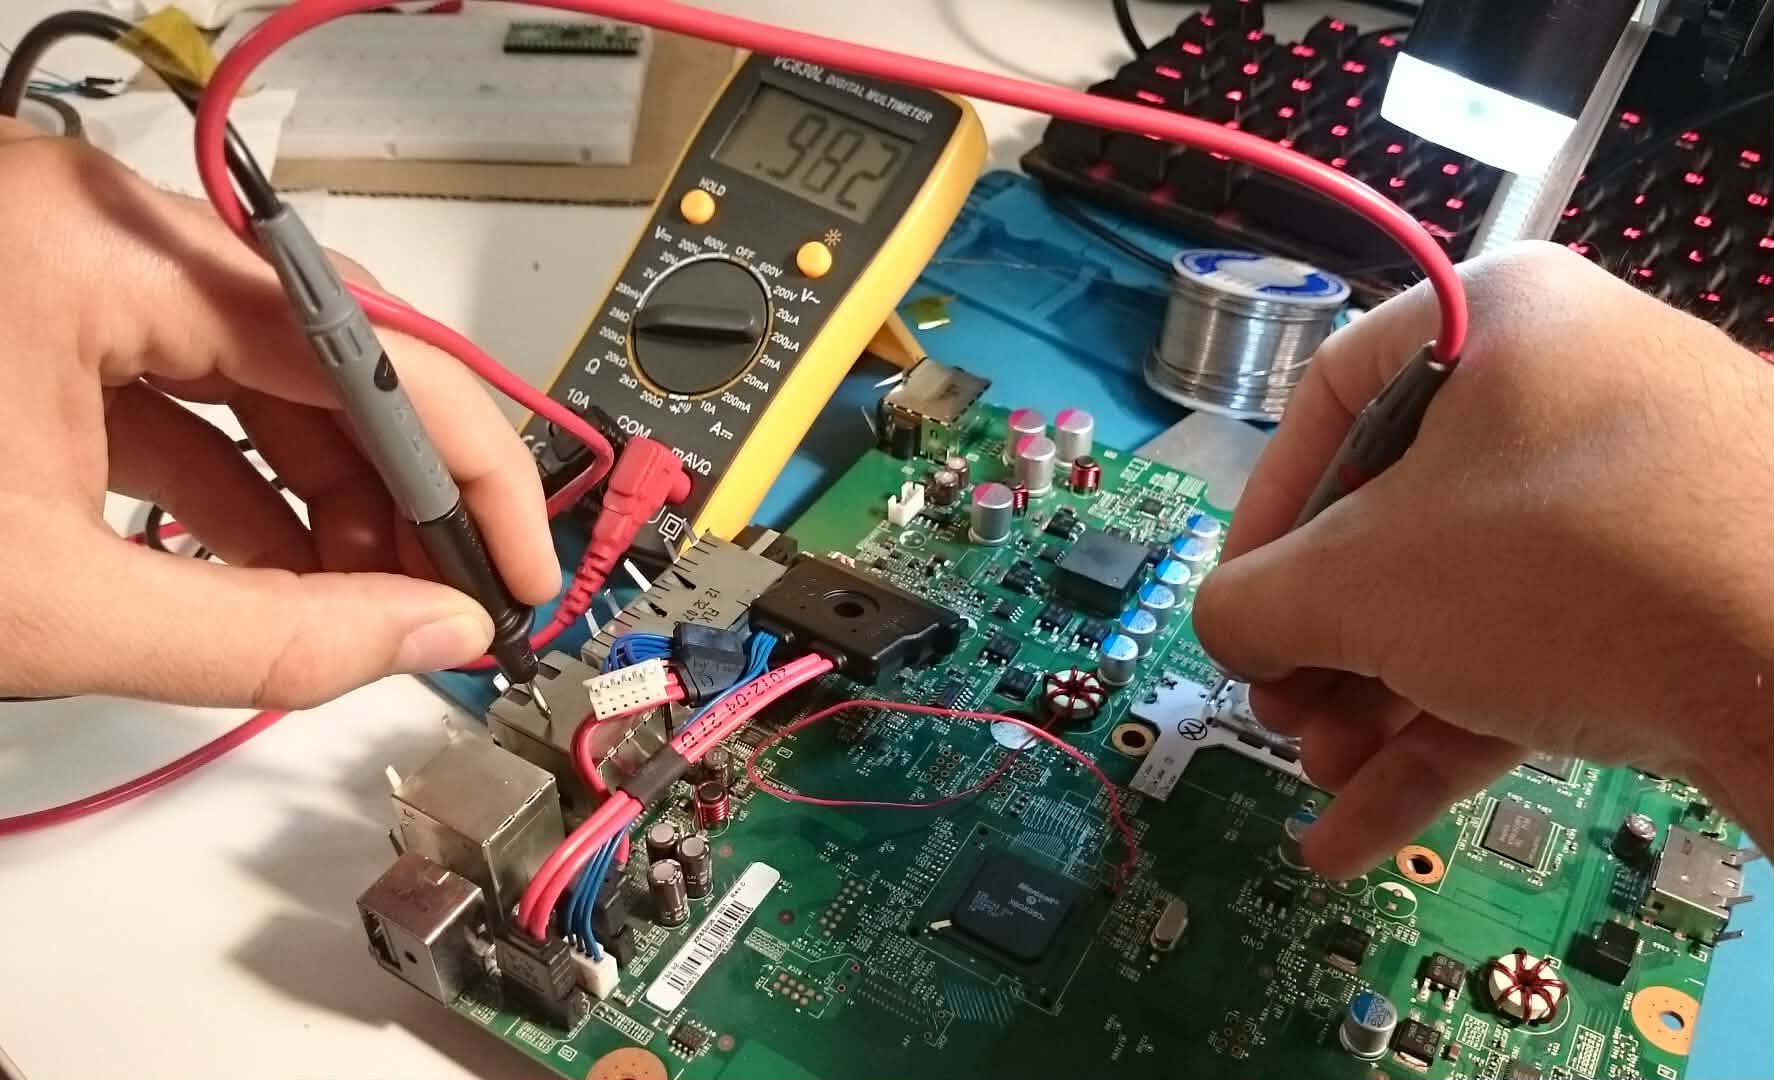
During installing the adapter I searched around the internet how to validate the connection of the pin, multiple forums said there has to be resistance across the two points to validate it is properly installed, there were some reddit posts questioning the value of the resistance. I was measuring way off numbers but decided to go with it.
I used the POST1 pad because that was the only one where I could measure resistance.
At the end it did not matter, just have continuity:
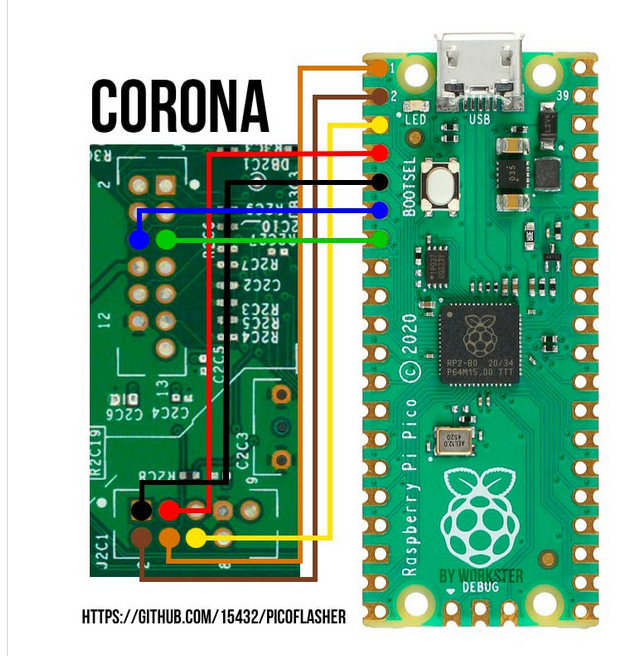
Pico Wiring
Pico wiring diagram for the PicoFlasher which is the original that was used for the exploit, not the other forks.
Finishing touches
- New cooling paste applied on the CPU.
- Everything kapton taped down neatly, the POST fix adapter is very important.
The first Execution
When the very first time in February I did the wirings I proceeded to the execution. Soldering job looked okay-ish, as I said in the beginning it was my first time SMD soldering. I checked everything for continuity, all looked great.
The next step was to load up J-runner. Unfortunately this tool only runs on Windows, therefore I spun up a Windows VM and passed through the Pico. Sounds sketchy I know. The first couples of times I did try Wine but something was off, and decided to use a VM.
J-runner discovered the Pico, I was able to read the NAND and Write XeLL. At this point I needed to plug in a TV and try to boot into XeLL. Well I couldn’t. Nothing happened, blank screen.
So the long debugging session started and went on for a lot of days, questing even the smallest details.
I did hardware level debugging, checked the joints, soldering, the video cabel (I was using RCA->EUROSCART at that point). I de-soldered everything and redid the wiring, now I couldn’t even read the NAND anymore. Gladly I had the original dump.
I was seraching around the internet, checking github issues, forums and lot of people was mentioning the unreliability of the Pico, so I thought maybe thats my problem. Tried a different wiring and version of the PicoFlasher but nothing was working.
I gave up for the time, was thinking ordering an XFlasher (which costs a lot), but at the end decided to just put the Xbox on the shelf and it sat there until December…
The second Execution
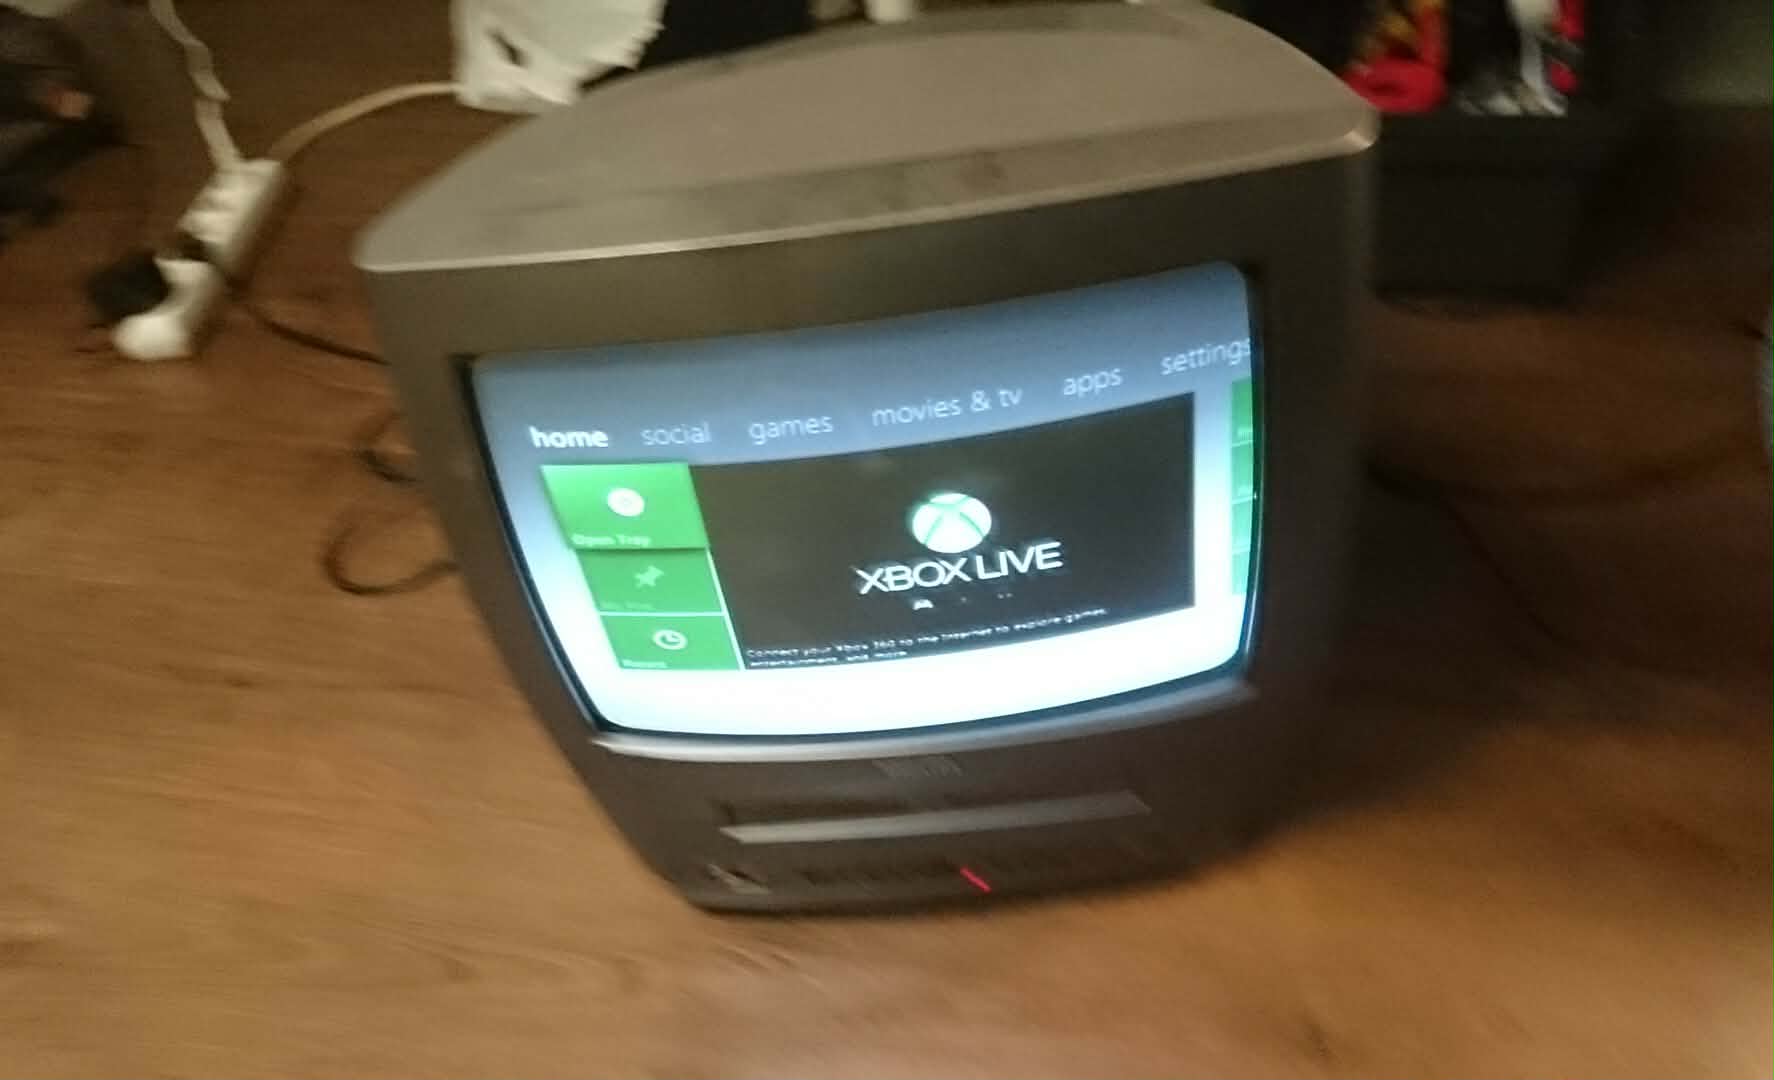
For the 3rd time I completely re-did my soldering job, those are the picture that you can see above. This time I was using my CRT which I found just a couple weeks earlier lying around on the street. I still could not read the NAND nor write it.
I was looking around on the internet to gather more information around XeLL, why does it not boot. For somehow my mind was only focusing on the circular on and off button of the Xbox and I think it was ConsoleMods where I saw or in a random Reddit thread, that your supposed to use the eject button.
It booted into XeLL. CPU key acquired.
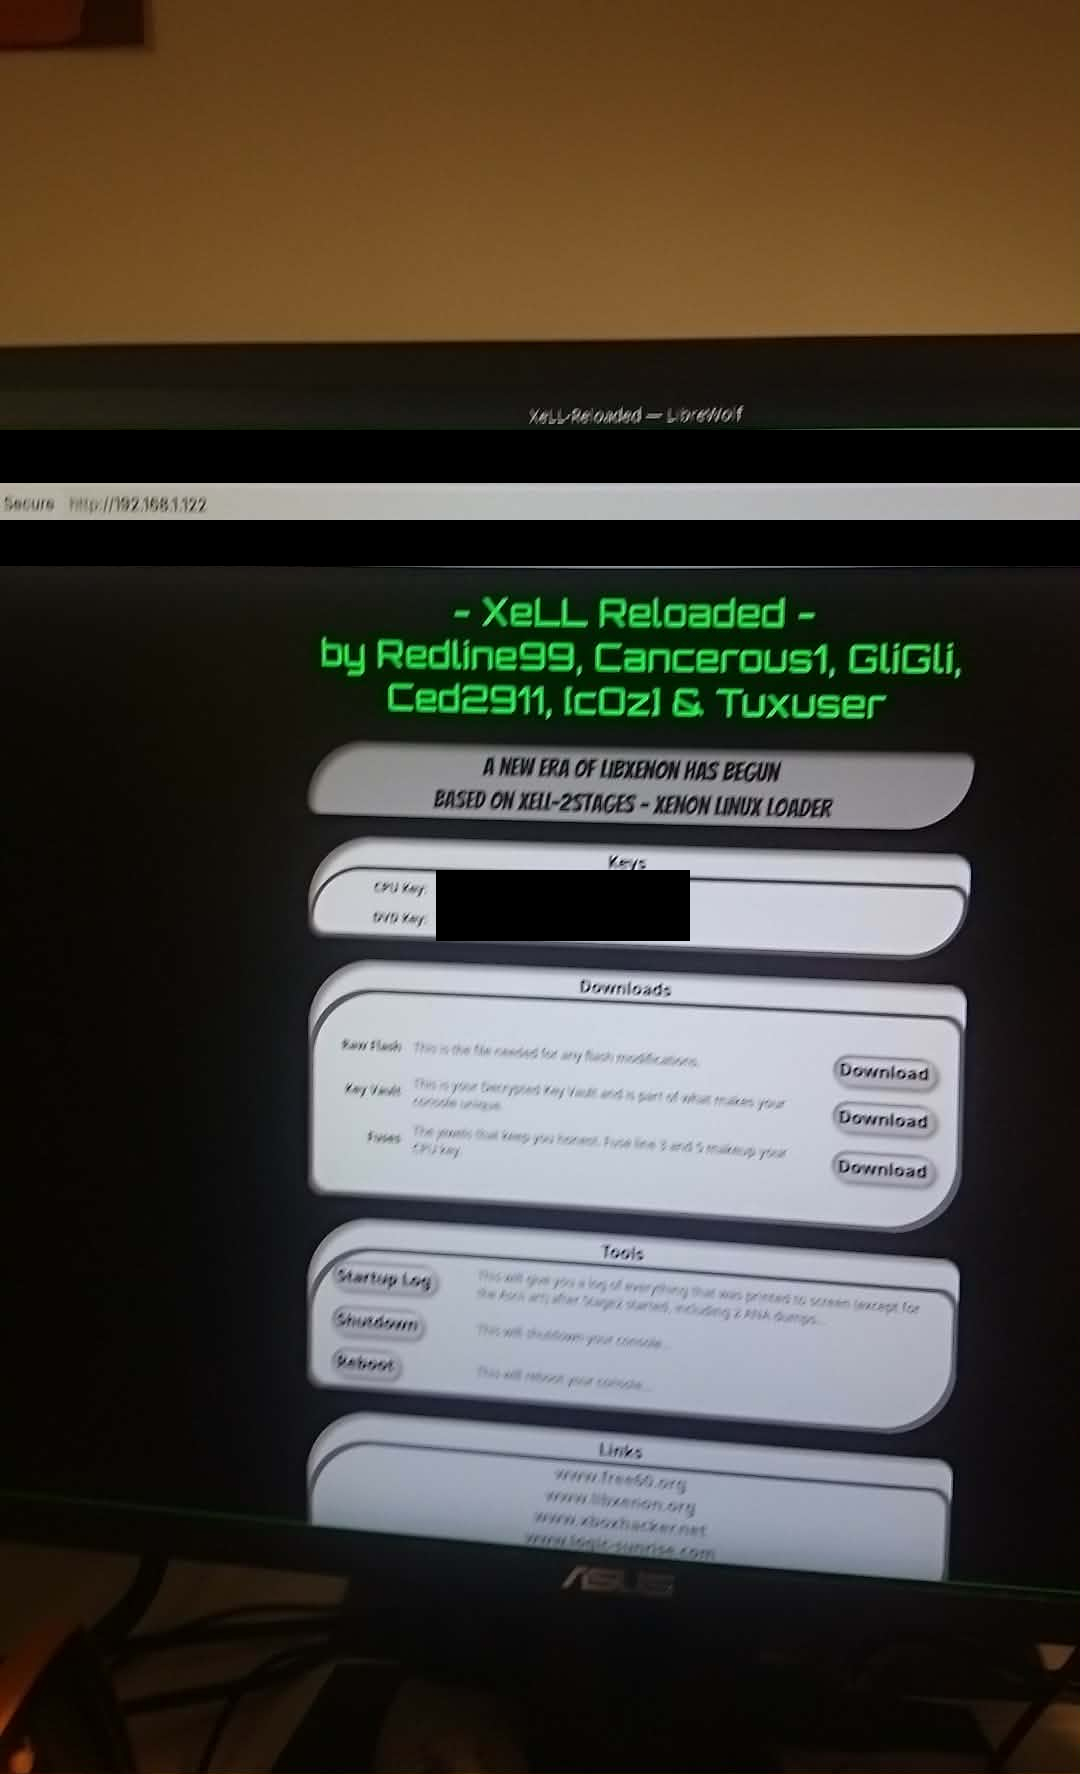
(I was using Ethernet at this point, I could not read the numbers on the CRT.)
I did not re-flash, I only re-did the soldering and it booted into XeLL. It was probably working all along and I managed to flash it successfully I was just not using the correct buttons to start it…
But I still had an other problem, I could not communicate with the Xbox through the PicoFlasher, and thats when I tried the original exploiters PicoFlasher layout referenced in his report, couple commits away from the X360Tools/PicoFlasher and using different wiring, and it was WORKING!!!
Post install
For the post install process I followed MrMarios guide on it.
From that point on my flow is, I use iso2god with Wine then transfer the games via FTP and use Aurora.
(The ftp default credentials are xboxftp:xboxftp)
Closing thoughts
This was a very fun and challenging experience. I played with the console a couple times and since then its just sitting in the cupboard. Thats how all my consoles end up.You hack it for the fun, and never actually use it.
References
- Official writeup - Xbox 360 security in details: the long way to RGH3
- Xbox 360 Hub guide
- How to RGH3 a Xbox 360 Slim (Corona) - Chipless RGH 3.0 Tutorial! - MrMario2011
- Octal’s Xbox 360 Identification Wizard
- HYNIX 26nm 32Gb based e-NAND product Family
- XenonLibrary - Waitsburg
- ConsoleMods - RGH3
- J-Runner-with-Extras github
- ConsoleMods - Xell
- Setting Up Aurora Dashboard on a JTAG/RGH Xbox 360 - Beginner Setup with XeXMenu & DashLaunch!